How to Install Intel Watchdog Timer Driver Windows 10
How to install the Intel watchdog timer driver [Easy Guide]
Loredana is a passionate writer with a keen interest in PC software and technology. She started off writing about mobile phones back when Samsung Galaxy S II was on top of the world and... Read more
- To restart failed instances of your app in an automatic way, getting the updated version of the Intel watchdog timer driver is crucial.
- In this case, do not hesitate to a ccess the manufacturer's website as described below.
- Even though more cumbersome, using Device Manager is always an option to consider.
- To simplify the process considerably, and also ensure the right driver is installed, using specialized software will help considerably.

XINSTALL BY CLICKING THE DOWNLOAD FILE
The Intel watchdog timer allows specific devices to leverage the platform's hardware.
It is also able to automatically restart the failed instances of your programs, logging the activity for troubleshooting. Therefore, it is important to properly install its related driver.
In today's article, we will discuss some useful recommendations that will help you install the Intel watchdog timer driver.
How can I easily install the Intel watchdog timer driver?
1. Access the manufacturer's website
- Visit the Intel download center.
- In the search box, type watchdog timer, and click on the shown result.
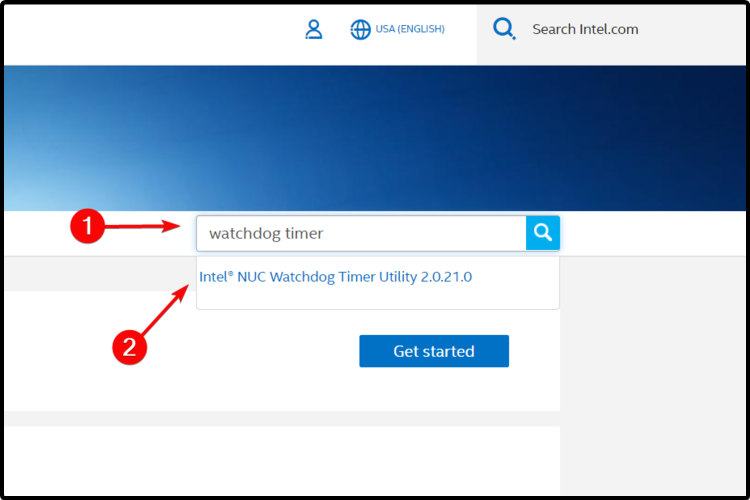
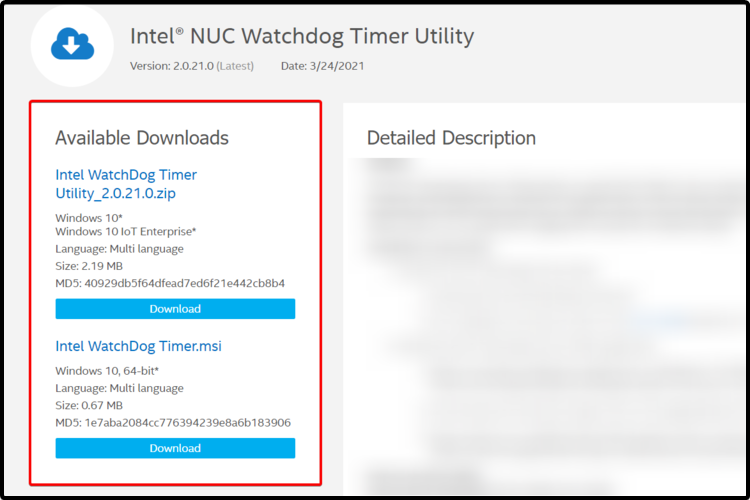
- Select your choice, then click on the Download blue button.

NOTE
To easily install the driver, do not hesitate to check out this useful uer guide.
2. Use Device Manager
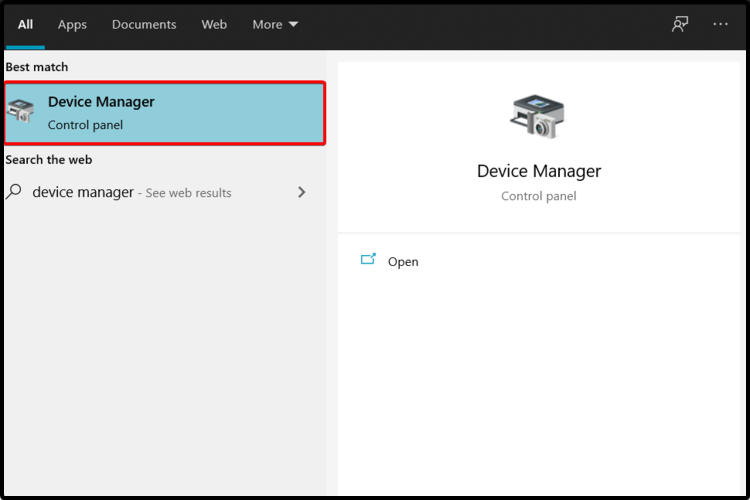
- Open Device Manager.
- Expand System devices.
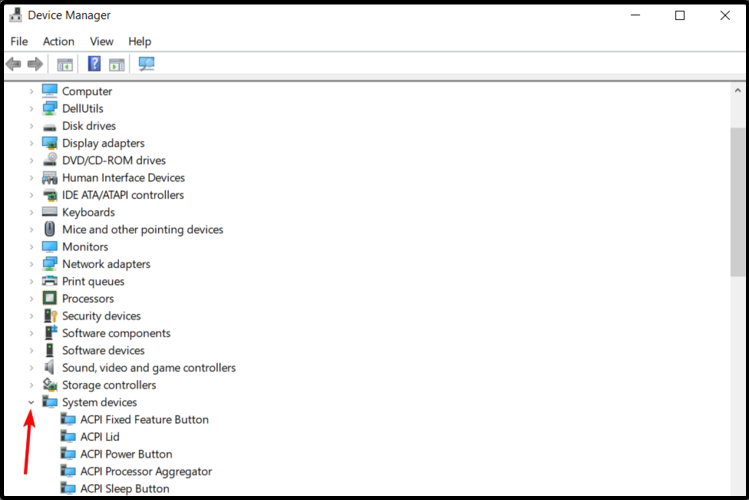
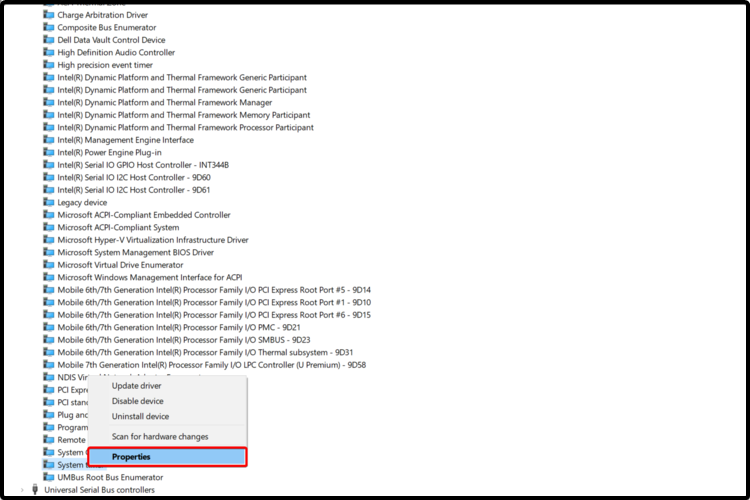
- Go to the System timer, right-click on it, and then select Properties.
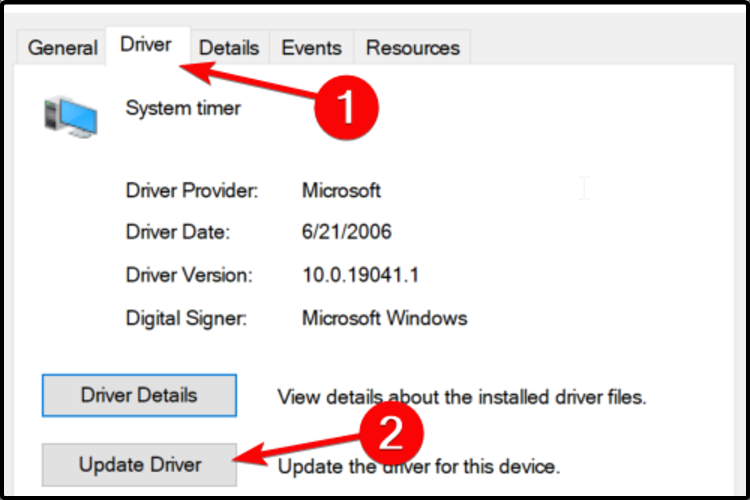
- Select the Driver tab, then click on Update Driver.
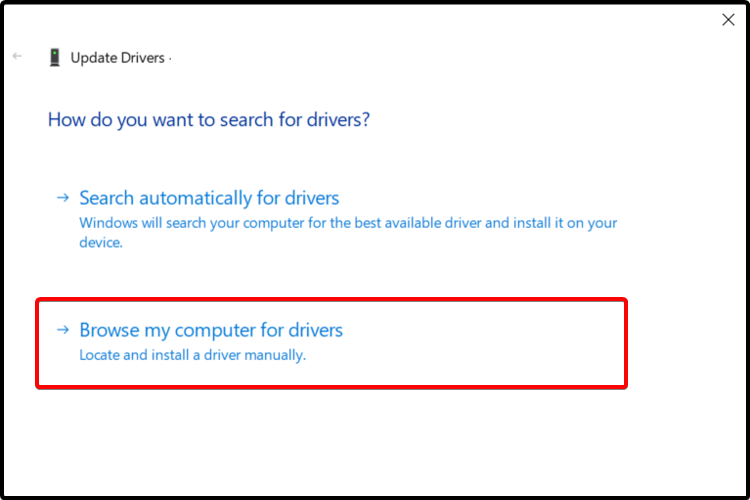
- Click on Browse my computer for drivers.
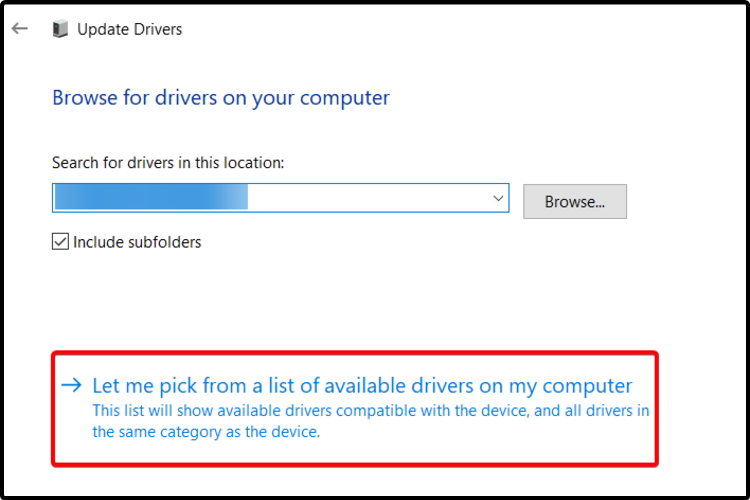
- Select Let me pick from a list of available drivers on my computer.
- Click on Have Disk…, then locate your driver file.
- Select Next and wait until the installation is completed.
3. Use third-party software
You can easily install the Intel watchdog timer driver with the help of dedicated third-party software. Comparing it to the manual methods, this automatic software can save much more of your time.
Also, driver installers allow you to perform actions on a friendly and intuitive interface.
Some of the most common Windows errors and bugs are a result of old or incompatible drivers. The lack of an up-to-date system can lead to lag, system errors or even BSoDs. To avoid these types of problems, you can use an automatic tool that will find, download, and install the right driver version on your Windows PC in just a couple of clicks, and we strongly recommend DriverFix. Here's how to do it:
- Download and install DriverFix.
- Launch the application.
- Wait for DriverFix to detect all your faulty drivers.
- The software will now show you all the drivers that have issues, and you just need to select the ones you'd liked fixed.
- Wait for DriverFix to download and install the newest drivers.
- Restart your PC for the changes to take effect.

DriverFix
Drivers will no longer create any problems if you download and use this powerful software today.
Disclaimer: this program needs to be upgraded from the free version in order to perform some specific actions.
As you can see, we've selected the best options found by scouring a variety of forums and online blogs. Make sure you also check some useful recommendations about how to update drivers in Windows 10.
Comment in the section below and let us know which of our suggestions worked best for your Intel watchdog timer driver installation.
![]()
Newsletter
How to Install Intel Watchdog Timer Driver Windows 10
Source: https://windowsreport.com/how-to-install-intel-watchdog-timer-driver/